5 Simple Steps To Scrub Your Email List (Remove Spam Traps In 1 Hr)

Last Updated Nov 04, 2019
Last Updated Nov 04, 2019
How much do you pay every month or every year on your email service provider?
If you’re a growing business, it’s probably around $1,000 per year, at the lower end. Some people pay several thousand per year or more.
Want to save money on your ESP, while simultaneously improving your list’s engagement rates (and your profit)? You need to scrub your email list.
In this post, I’ll teach you how to scrub your email list. Let’s dive in!
Before you spend any time scrubbing your list, how do you know if you even need to? The three signs you should clean your list are:
A drop in your open or clickthrough rate.
An unusually high number of unsubscribes on your recent campaigns compared to previous ones.
An increase in spam complaints on your email sends.
If you’re noticing these things, it’s time to clean your list. Even if you aren’t seeing these signs, but you have a high bill from your ESP, you can save money by cleaning your list.
Plus, a clean list means higher open rates, more clicks, and, ultimately, more sales. So it’s never really a bad idea!
The first step is to segment your list into two parts:
People who have opened an email from you in the last 90 days.
People who haven’t.
Anyone who hasn’t opened an email from you in the last 90 days is considered a “cold” subscriber. They’re not engaging with your emails and have a higher chance of being dud or spam trap emails, or are recipients who are simply no longer interested in what you have to offer.
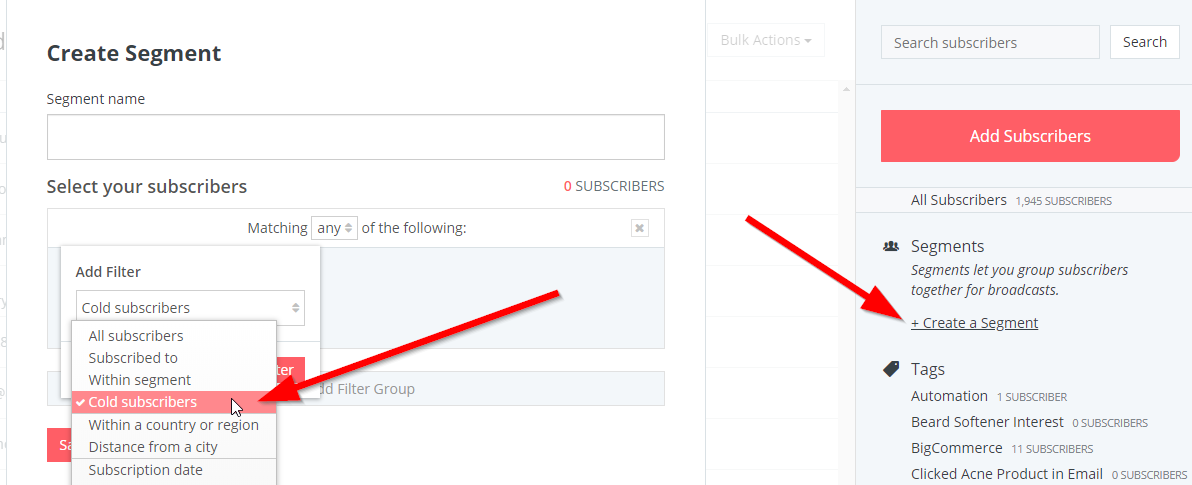
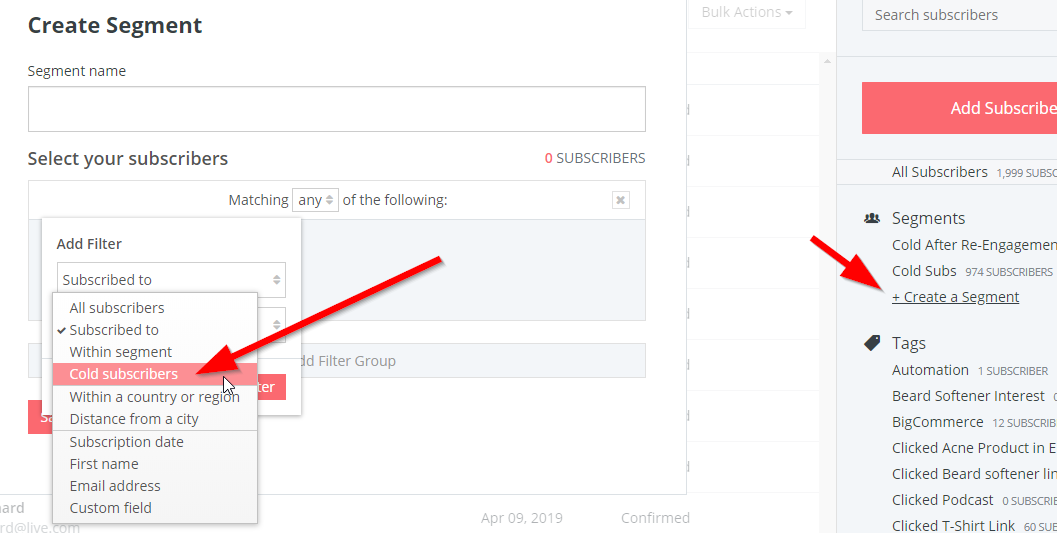
Segmenting your list is usually pretty easy with most ESPs. For example, if you have ConvertKit, go to your Subscribers page, scroll down and click +Create a Segment on the right-hand side, then add the filter Cold subscribers (anyone who hasn’t opened an email in 90 days).
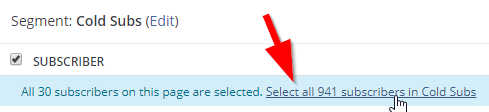
Name and save the list, then select them all by clicking the Subscriber checkbox and clicking Select all X subscribers in [list name].
Finally, click the Bulk Actions dropdown and select Export.
After a few minutes, you’ll get an email with the exported list attached. Save the spreadsheet, then move on to step two.
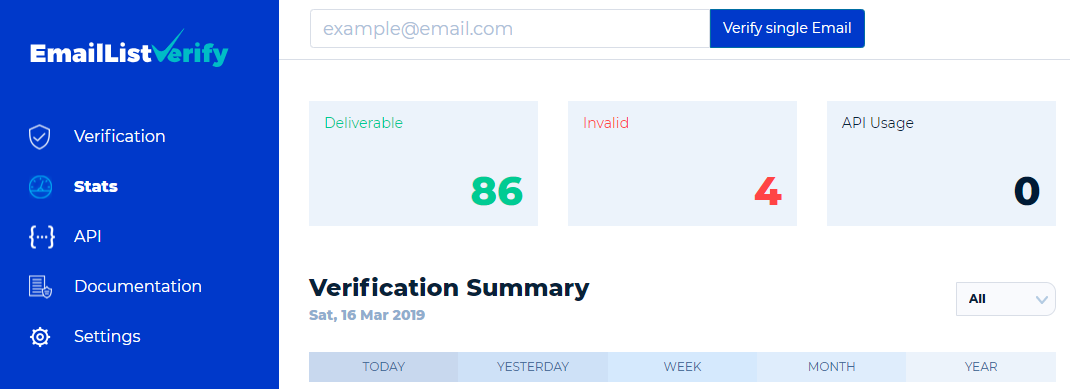
Run your inactive subscriber list through an email list cleaning tool like EmailListVerify.
These tools filter out misspelled, bogus, invalid, and spam trap emails (an email address that's not used, but is actively monitored for spam). Once you scan your list, you’ll get a report of which emails are “Deliverable” and which are “Invalid,” like this:
After you’ve cleaned it, take the list of valid (deliverable) email addresses and segment them into a separate list in your ESP.
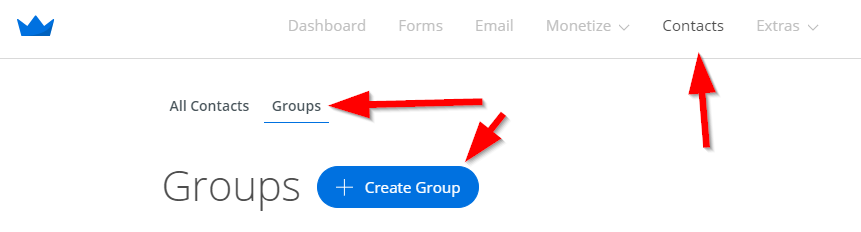
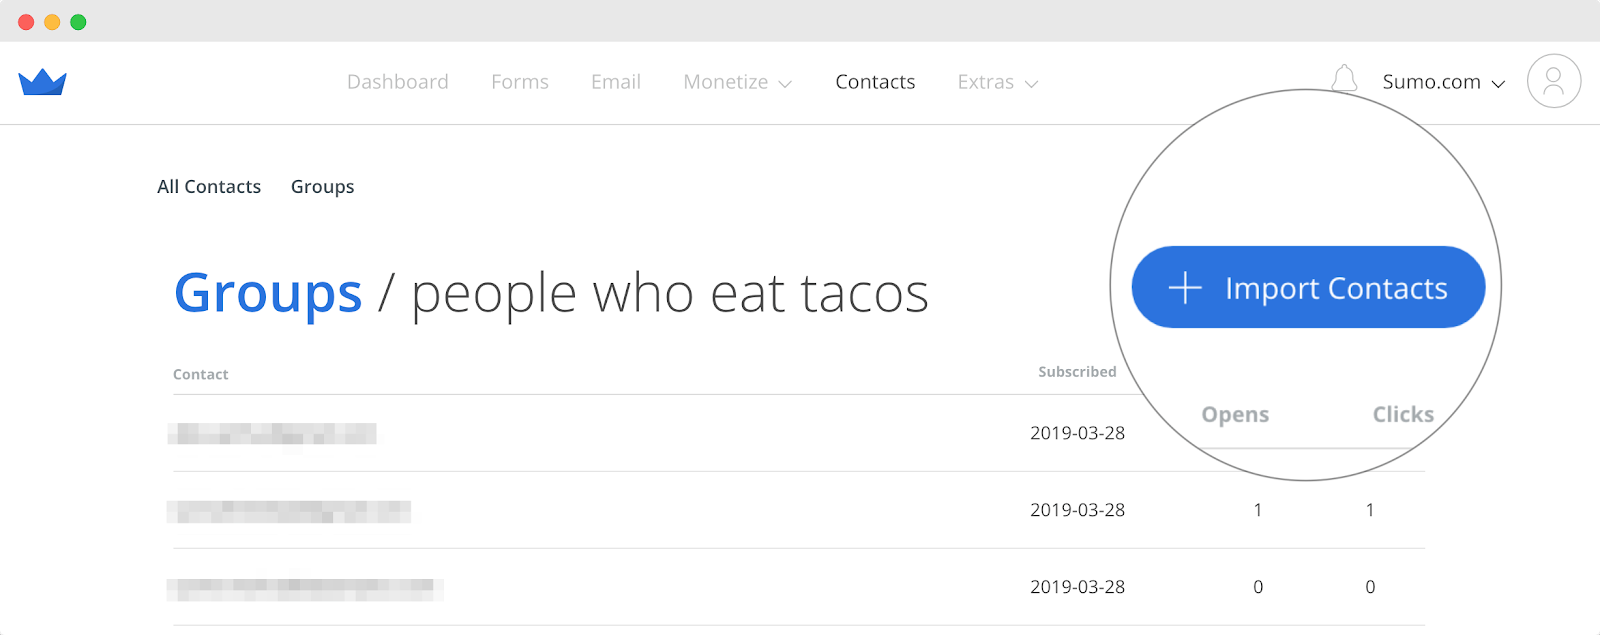
To do this with Sumo, click Contacts, then go to the Groups tab. Click the blue + Create Group button. Name the group something like “Inactive Deliverable Subs.” Only you can see the name, so make sure you remember what it is.
Import the CSV file to this new group.
We’re going to send a re-engagement campaign to these people to either clean them from our list permanently or get them back as active subscribers.
Here are two examples of re-engagement emails you might send. First, an example if you run an ecommerce store:
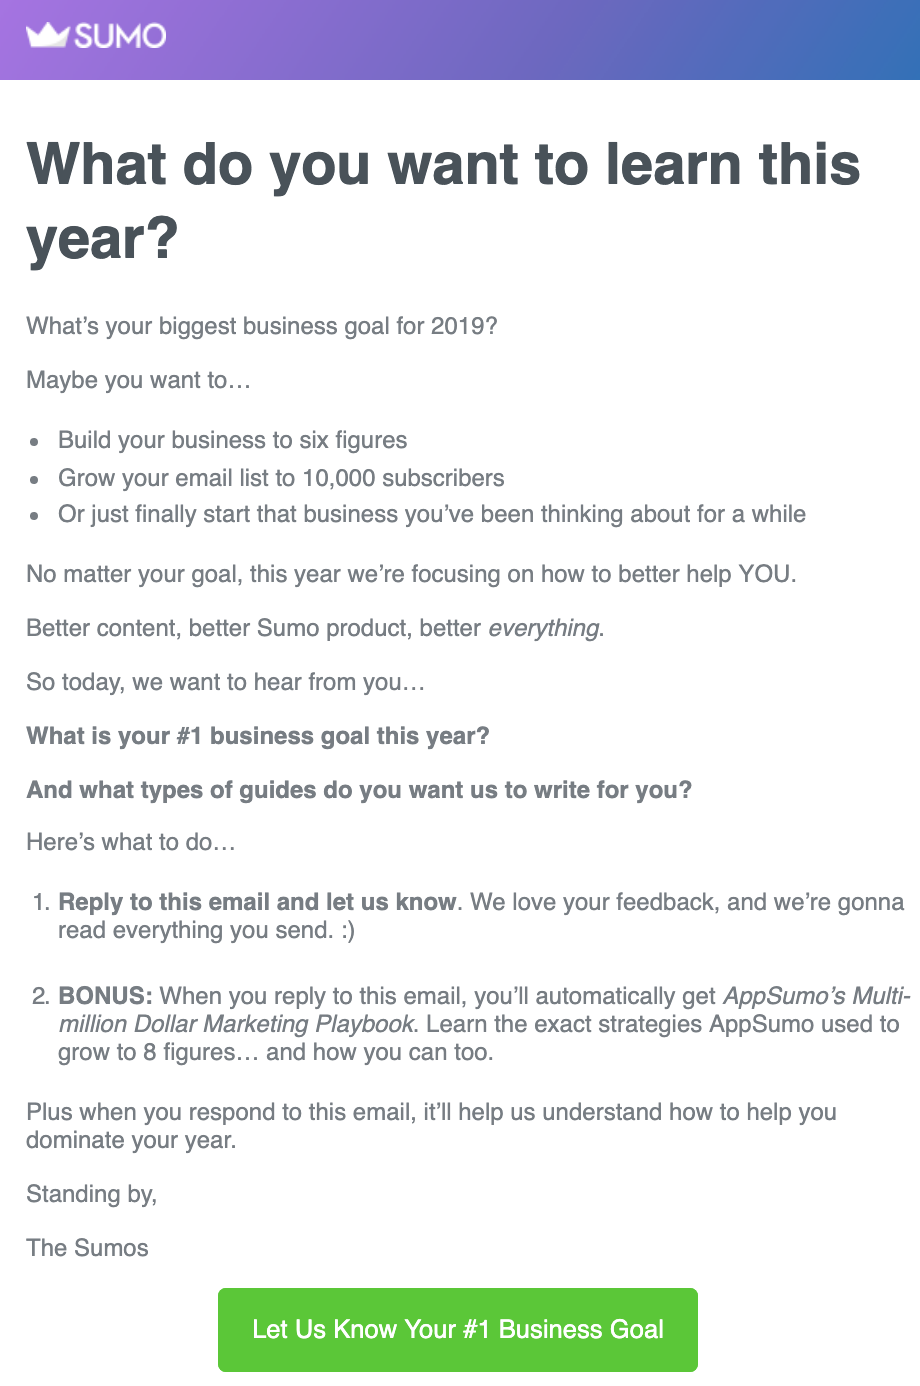
Or send something like this for a non-ecommerce business:
You want to piqué your inactive subscribers' interest with an offer, question, or something they really care about. You want to get them to open your email by using an interesting subject line so they can be put back on your active subscriber list.
After your list is cleaned and you’ve discovered who your active and inactive subscribers are, you’ll want to completely stop sending emails to anyone who didn’t respond to the re-engagement campaign.
To do this, re-upload the cleaned spreadsheet you just created and segment them into a new list (such as “active subscribers”).
In ConvertKit, go to the Subscribers tab, click +Create a Segment, then create another filter for “Cold Subscribers.”
Export those subscribers to a CSV the same way you did before, then select them all again and click the Bulk Actions dropdown, and click Delete.
Make sure you save your inactive subscribers in a spreadsheet or notepad file! You can use this list to send them retargeting ads for your content.
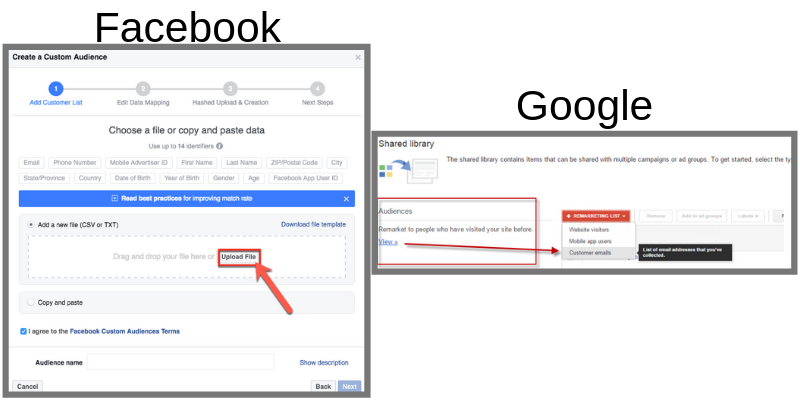
For example, you can upload your email list to Facebook or Google Ads and display your new content or new product/service offerings to try to re-engage them in a way that isn’t a direct email.
If you really want a clean list, one final is removing any email subscribers who reply with canned-response emails. However, this step is extremely time-consuming, so it may not be worth your time.
Doing it is fairly simple. Just go to your reply-to inbox and look for any replies that sound robotic or automated.
Things like “AutoReply,” “Thanks for your message!” or anything that simply doesn’t make sense. You’ll know it when you see it. Once you do see it, remove those emails from your list — and you’re done!
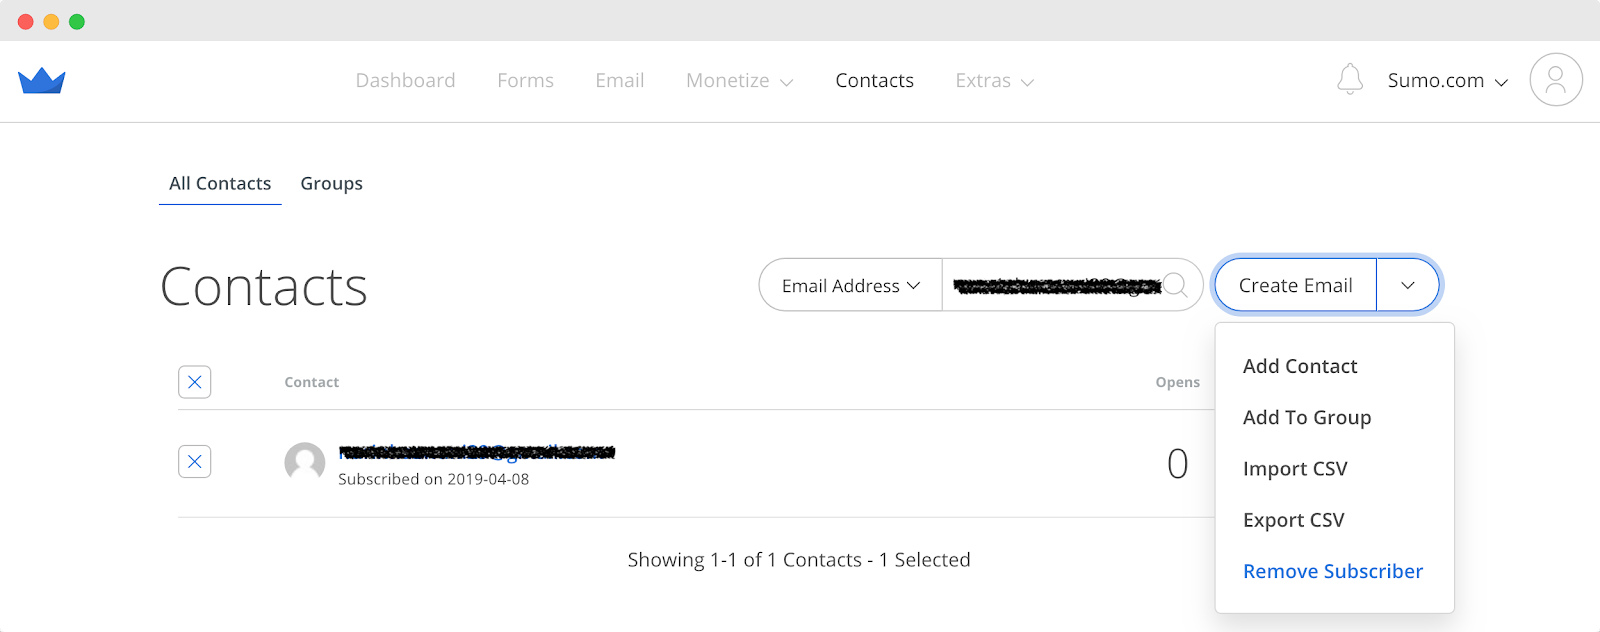
Inside Sumo, click Contacts, search for the email address you want to remove, then select Remove Subscriber from the dropdown menu.
You now have a clean list.
If you successfully cleaned your list, you should see a dramatic increase in open rates since you’re no longer sending to inactive or bogus email addresses.
But cleaning your list and keeping it clean are two different stories!
To ensure a forever-clean list, you should follow some basic opt-in practices, such as:
Use proper double opt-in emails to avoid fake subscribers.
Make sure your offer is aligned with the content you provide (content upgrades help massively with this).
Avoid common email opt-in mistakes (like making your headline too creative).
Additionally, set a reminder for yourself to go through these five steps again in six months. It doesn’t take long (maybe an hour or two, tops) and it can keep bad emails out of your list.
Want to keep your list clean forever? Click the button below to download my email scrub checklist. It has all the steps on one page for you to quickly scrub your list any time you need to.
It even tells you how to set up an automated reminder in 6-12 months to make sure you’re regularly cleaning your list!
Click the button below to get it now and add it to your company’s standard operating procedures.
The money is in the list. So make sure you keep it clean!


Comments